Y-Axis Tear down
Step 1 (Y-axis tear down)
 |  |
 |
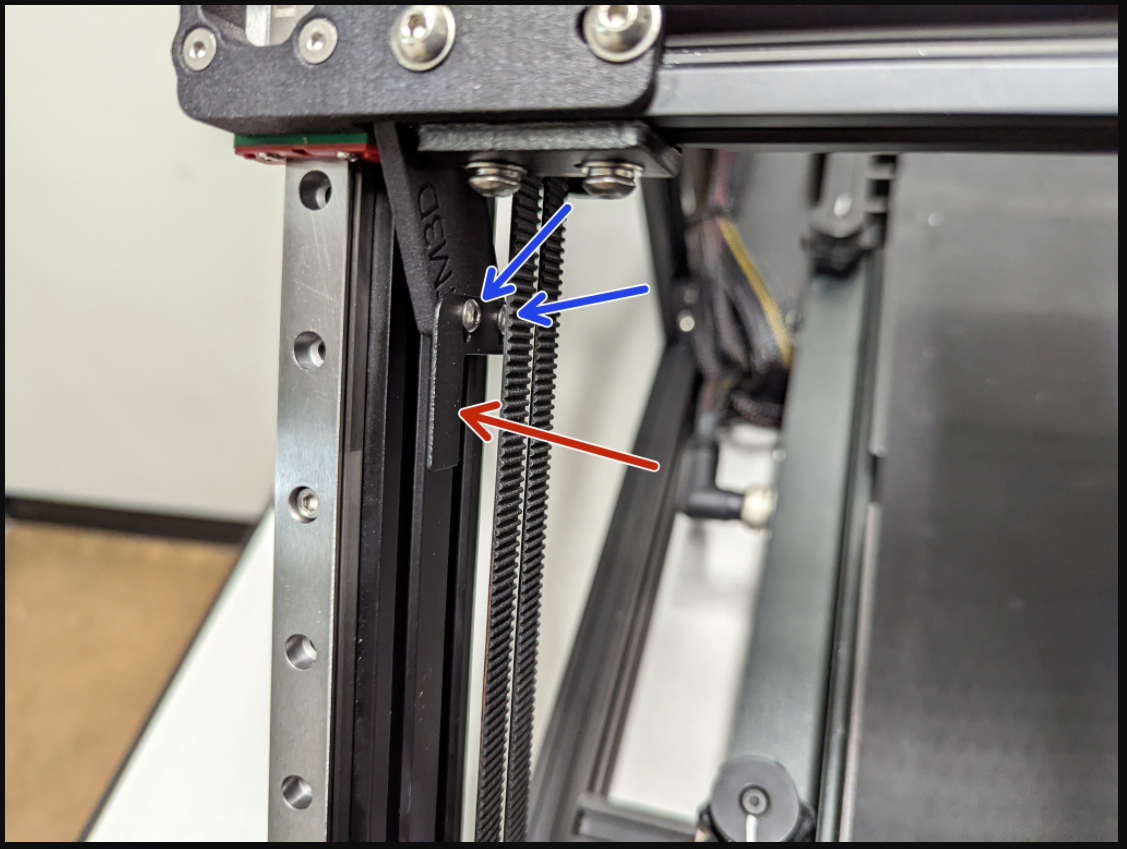
Loosen indicated bolts on X and Y-axis motor mounts on one side and slide the belt off the pulley. Repeat for other side.
Step 2 (Y-axis tear down)
 |  |
 |
- Loosen and remove lower V-slot wheels and hardware on one side of the Y-axis extrusion.
- Remove V-slot gantry and repeat for the other side.
Step 3 (Y-axis tear down)
 |  |
 |
- Remove 2, M4 bolts holding the Y-axis carriage on one side. Repeat for the other side.
- Remove 1, M3 bolt on one side to detach the Y-axis v slot wheel plate from the idler pulley assembly. Repeat for the other side.
Y-Axis Install
When installing the Y-axis kit, work on one side at a time.

Do not allow the linear rail blocks to slide off the rails! Ball bearings will fall out, and the rails will not slide properly. You can add some masking tape on the bottom side (to account for gravity.)
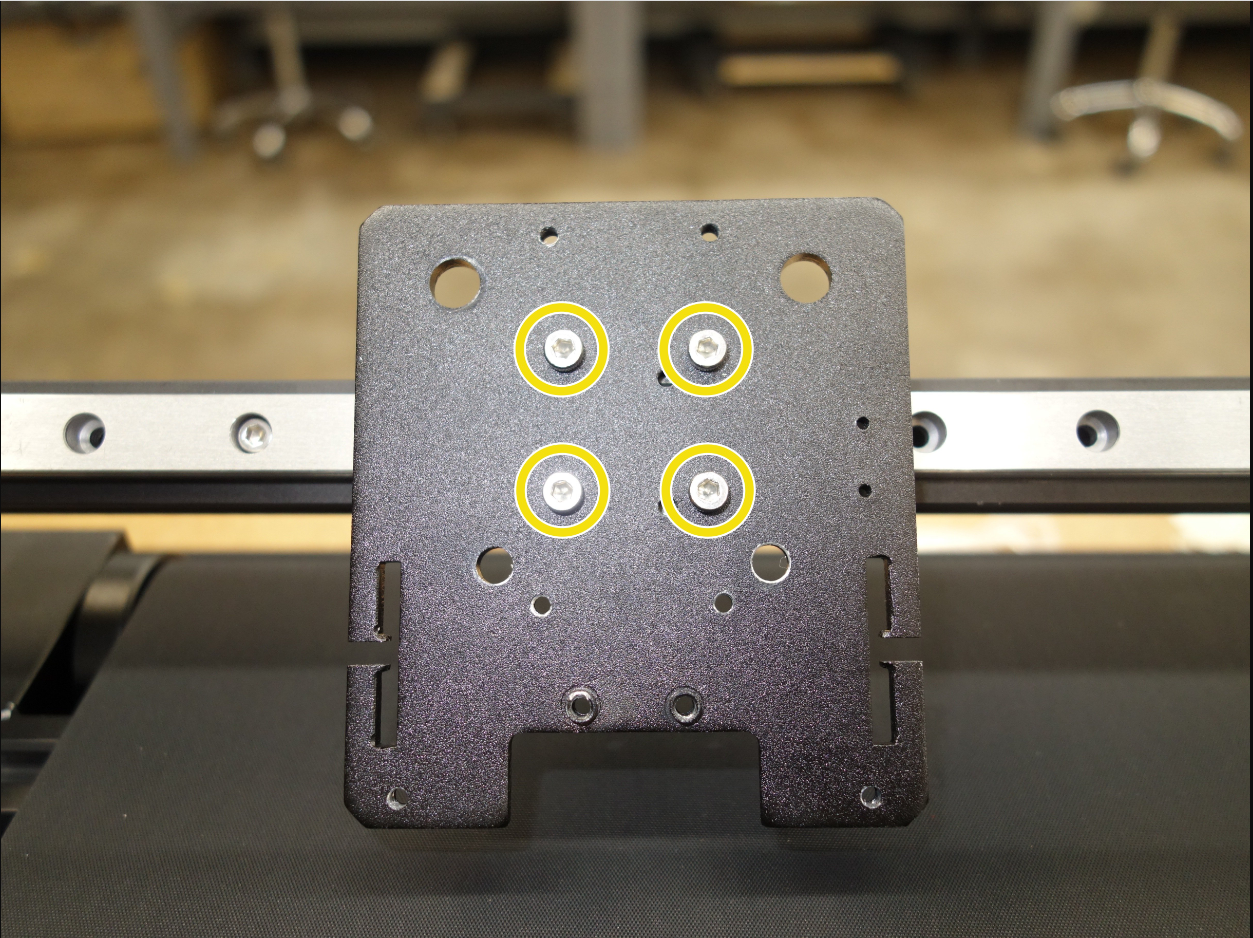
Step 1 (Y-axis install)

- Remove all 4, M5 BHCS, one side at a time (yellow circled)
- Remove Black 2X M5 socket head screws (blue circled)
Step 2 (Y-axis install)
- Build the rails with M3X8 SHCS and Sliding-T nuts, leaving 2 open holes between mounting points on the rail.\
- The included, printed guide will help to square up the T-nuts for easier insertion.

Y-axis end stop side (left)
- Slide in the printed alignment tool
- Slide the rail and use the printed part as a rail as a rail stop.
- Use the included Rail alignment jigs to center up on that side of the extrusion

Y-axis other side (right)
- Flip the Alignment tool over
- Slide the rail and use the printed part as a rail as a rail stop.
- Slide the stop down till it hits the printed part
Step 3 (Y-axis install)
On each side
- 2, M4x25 BHCS with locking washer and flat washer
- Mounts TM3D adapter brackets to frame
- 2, M3x8 BHCS, flat washers and t-nuts
- REUSED from Y axis teardown, step 3
- Attaches TM3D Y-axis end stop flag mount
- 4, M3x16 SHCS with flat washer
- Mounts TM3D adapter brackets to linear rail block
Be sure to install all new fasteners carefully a few threads before tightening any.

- Start with the M4 bolts/ washers (orange) into the frame, hand tight.
- Next, move the linear rail block to line up with the TM3D brackets and start all 4, M3x16 SHCS by hand, or gently with a hex tool.
Since you are tightening against aluminum, the only risk of damage is if you cross-thread these fasteners.

- With the brackets square to the frame, tighten all 6 fasteners (orange/ blue) from previous image. Repeat on the other side.
The bottom of the brackets should be aligned with the X Axis frame. You can use the side of a digital caliper, 3 or 4 mm hex key or any straight edge thin enough to fit.
- Reinstall Y-axis end stop flag
- REUSED metal Y-axis end stop flag
- REUSED M3X6 BHCS
- M3 hex nuts captured in the backside of TM3D flag mount
Stock X axis Tear down
A1 | A2 |
A3 | A4 |
A5 | A6 |
A7  |
- Remove the 2 hotend cover screws (A1/A2)
- Remove stock X endstop bracket
- Remove the 2 hotend mount screws (A5/A6)
- Remove the Nylon lockouts
- Remove Wire strain relief screws (A7)
 |  |
 |  |
Loosen the belt tension on both sides
Remove both belts
 |  |
 |  |
- Remove the nuts for the Top 2 V-slot wheels
- Remove the X-Carriage
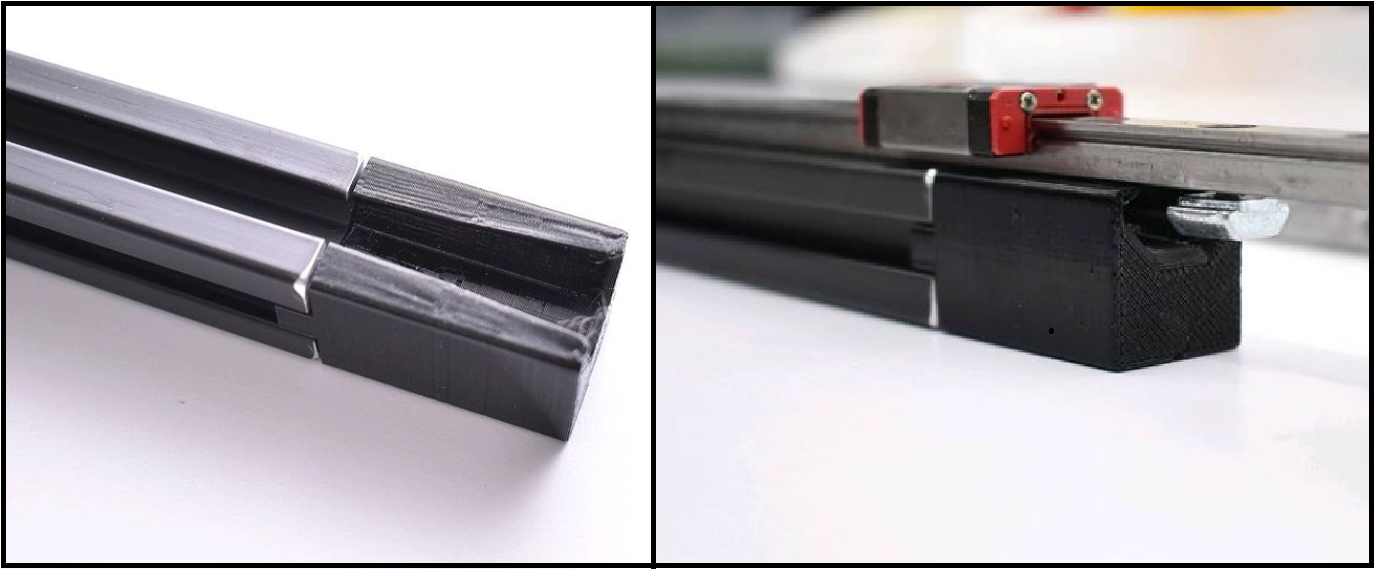
X-Axis Linear rail install
5xM3x8 SHCS
5xM3 Spring T-nuts
2xMGN 12 Linear Rail Guides
- Install the mounting screws with 2 mounts spaces skipped between mounting points
- First Slide t-nut and align to the rail
- Use included alignment jigs to center the rail on the extrusion
 |  |
 |  |
 |  |
X-Axis Carriage mount
- Drilled X-Carriage Plate
- Dog Bone Acrylic belt spacer
- 4x M3x8 SHCS
- Slide the belt through Dog bone belt spacer first
- Slide the belts back into the X Carriage plate
 | Dog Bone Acrylic belt spacer |
 |  |
X Endstop Mounting
- Remove the stock endstop bracket
- Endstop mounting screws are reused
- Mount the endstop directly to the Drilled X-Carriage Plate as shown below

Hotend mounting
Remount the hotend in the reverse order of stock hotend assembly removal