This guide may be abbreviated in some areas. It is not intended to be a fully comprehensive document. Debian 11 (bullseye) and Klipper are not able to flash to Duet mainboards properly. To work around this, we have built and tested a Debian 10 (buster) image with only the required installed packages to flash Duet mainboards successfully. The process below is geared for TM3D Troodon users but the process is the same for all Duet boards*
*caveat
Required Tools
USB drive 16-64gb - USB2.0 is fine, USB3.0 will speed the processes up.
Required Software
Raspberry Pi Imager https://www.raspberrypi.com/software/
SSH client of choice - Windows (cmd) , Mac (terminal) and Linux (terminal) all have built in terminals that can be used.
Download and Flash the Image
Flash the image from the link below onto a usb drive (16-64gb) using Raspberry Pi Imager. Once flashed, you can plug into one of the usb ports accessible on the outside of the machine. For OS, Use Custom and select the downloaded bootdrive image from below. For Storage, choose the USB stick. Click Write. It may fail on the first try but just redo the process and it should start writing the second attempt.
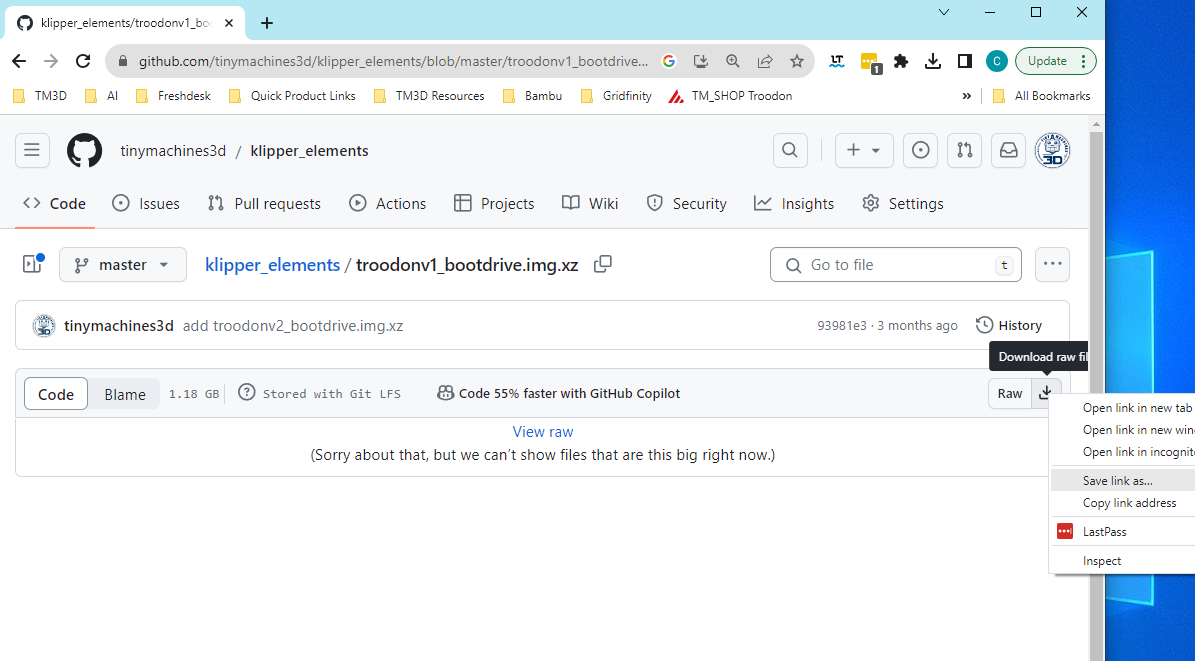
Right click on the download button on the right (next to Raw) and then Save link as... The file is 1.2gb.
Determing Pi Model
This guide is intended for moderately skilled users that can complete this step on their own.
The link below outlines the process for a windows users. For Mac, you can use Terminal and the process is the same.
https://jarrodstech.net/how-to-raspberry-pi-ssh-on-windows-10/
From SSH
cat /proc/cpuinfo | grep "Model"
or (if permission denied)
sudo cat /proc/cpuinfo | grep "Model"

Booting from USB (Raspberry Pi 3B)
Booting from USB (Raspberry Pi 3B+ , 4)
Setting up Boot Priority (leave original SD card inserted)
If your Raspberry Pi is accessible, you can omit these steps by powering off, removing SD card and plugging in the USB boot drive. Once powered, the pi will boot from USB.

For TM3D Troodon users, follow the steps below.
From SSH
sudo raspi-config
>Advanced Options
>Boot Order, choose USB Boot (If you don't see boot order as an option, stop and we will have to remote in)
Ok to exit out and save the changes.
Sudo reboot
The pi will reboot and use the USB as its hard drive instead of the sd card. IP, user and password will be the same.
TM3D Troodon Users, follow the steps below. Other Duet users, choose 4) Build + Flash and configure the firmware appropriately. The pre-compiled klipper.bin is for Duet Wifi.
Flashing Klipper Firmware
SSH back into the device
cd ~/ && ./kiauh/kiauh.sh
if prompted to update, select yes and run the above command again
>4 Advance
>3 Flash only
>1) Regular flashing method
>1) USB
>1) 1 for MCU
At this point, you should see the serial for the duet mainboard, something like /dev/serial/by-id/usb-Klipper_sam4e8eXXXXXXX
After going through this process, if it hangs or doesn't show finished. You can run the process again and you may see the serial number change to something like /dev/serial/by-id/usb-03eb_6124-if00. This is ok. Choose that during the process and you should see a succesful write to the mcu. Scroll down below the pictures for next steps.
Exit Kiauh with B then Q
Verifying Results
To verify you have klipper firmware back on the mainboard,
ls /dev/serial/by-id/*
You should see /dev/serial/by-id/usb-Klipper_sam4e8e_xxxxxx~. This will not change from before. If you see /usb-klipper_sam~ the process is complete.
sudo shutdown now
Power off the machine
Remove the USB stick and save as a boot disk for this process in the future when Klipper updates break connection again.
Power on the machine and check mainsail for connection.
Chris Bennett
Owner | TM3D